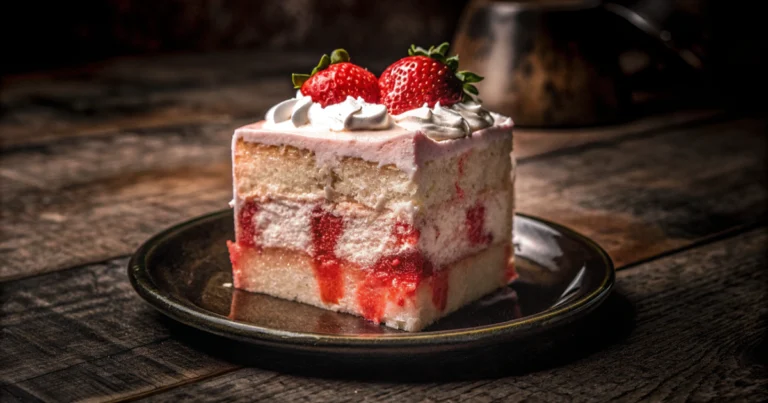
Banana Pudding Cheesecake Recipe: Baked & No-Bake Southern Classic
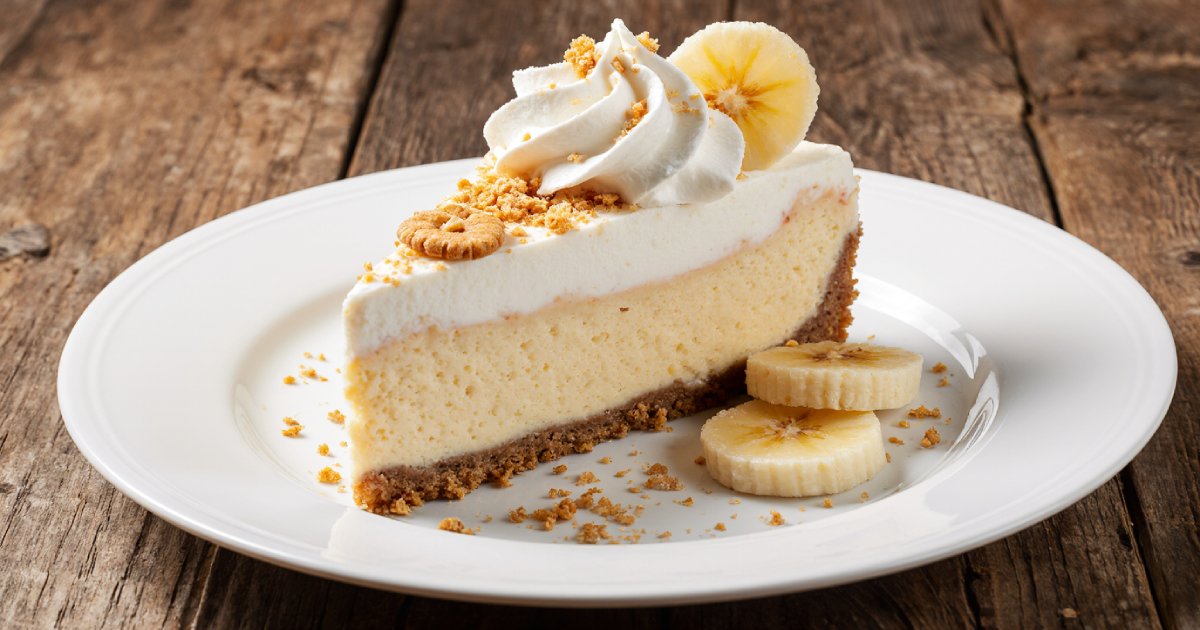
Banana pudding cheesecake is the kind of dessert that stops people mid-bite. It takes everything people love about classic Southern banana pudding and builds it into a rich, creamy cheesecake: a buttery Nilla Wafer crust, a roasted banana filling, a cool vanilla pudding layer, and a cloud of homemade whipped cream on top. Two beloved American classics, one outstanding dessert.
This guide covers the full baked version with step-by-step photos, a simplified no-bake option, make-ahead tips, and answers to every common question. Whether this is your first cheesecake or your fiftieth, you will find everything you need here.

What makes this recipe different: We roast the bananas before they go into the batter. This one step concentrates the natural sugars and deepens the flavor far beyond what raw mashed bananas can deliver. Once you try it, you will never go back.
- Roasted bananas for deeper, more intense banana flavor
- Nilla Wafer crust that stays true to the classic banana pudding tradition
- No-bake version included for a quick, oven-free alternative
- Full banana pudding experience with pudding layer, whipped cream, and cookie garnish
- Crack-free baking tips explained in plain, practical terms
*This post contains affiliate links. We may earn a small commission if you purchase through these links, at no extra cost to you.
What Is Banana Pudding Cheesecake?
Banana pudding cheesecake is a hybrid dessert that combines the structure and richness of a classic baked cheesecake with every element of traditional Southern banana pudding. It is not simply a banana-flavored cheesecake: it specifically recreates the full layered experience of the original pudding dessert.
The distinction matters because the Nilla Wafer crust, the pudding layer, and the whipped cream topping are what make it banana pudding cheesecake rather than just banana cheesecake. Each component plays a specific role in the flavor and texture of the final dessert.
| Feature | Banana Cheesecake | Banana Pudding Cheesecake |
|---|---|---|
| Crust | Graham cracker | Nilla Wafer cookie crust |
| Filling | Banana-flavored cream cheese | Roasted banana cream cheese |
| Top layer | Plain or fruit topping | Vanilla pudding and sliced bananas |
| Garnish | Varies | Whipped cream and Nilla Wafers |
| Flavor profile | Mild banana | Full banana pudding experience |
Ingredients for Banana Pudding Cheesecake
Each ingredient below plays a specific role. Understanding why each one matters will help you troubleshoot if something goes wrong and make confident adjustments to suit your taste.
Nilla Wafer Crust
- Nilla Wafers (2 cups / 275g crumbs): The vanilla cookie flavor is what separates this from a standard cheesecake. Graham crackers do not replicate it.
- Granulated sugar (2 tbsp): Lightly sweetens the crust without overpowering it.
- Unsalted butter (1/2 cup, melted): Binds the crumbs and adds richness.
- Pinch of salt: Balances the sweetness and brings out the butter flavor.
Cheesecake Filling
- Cream cheese (32 oz / 900g), room temperature: Block cream cheese only. Tub cream cheese has too much moisture and will make the filling runny.
- Ripe bananas (2 to 3, for roasting): The riper, the better. Brown speckles mean more sugar and more flavor.
- Granulated sugar (3/4 cup): Sweetens the filling without making it heavy.
- Sour cream (1/3 cup), room temperature: Makes the texture smoother and slightly tangy, which balances the banana sweetness.
- Vanilla extract (2 tsp): Rounds out the banana and cream cheese flavors.
- Eggs (4 large), room temperature: Provide structure. Adding them cold or overmixing after they go in causes cracks.
- Cornstarch (2 tbsp, optional): Adds stability and helps prevent cracking, especially useful for beginners.
Pudding Layer
- Instant vanilla pudding mix (half a 3.4 oz package): Sets quickly without cooking and creates the signature banana pudding topping.
- Cold milk (1 cup): Activates the instant pudding. Must be cold for it to set correctly.
- Fresh bananas (1 to 2): Sliced and layered under the pudding.
Whipped Cream Topping
- Heavy whipping cream (2 cups): Full-fat only. Do not substitute with half-and-half or light cream.
- Powdered sugar (2 tbsp): Sweetens gently without graininess.
- Vanilla extract (1 tsp): Flavors the cream without overpowering.
- Nilla Wafers: For garnish. Add just before serving to keep them crisp.
The most important ingredient tip: Every dairy ingredient (cream cheese, sour cream, eggs) must be at room temperature before mixing. Cold cream cheese creates a lumpy batter that stays lumpy no matter how long you mix. Set them out at least one hour, ideally two, before you start.
The Secret to Deep Banana Flavor: Roasting
Most banana cheesecake recipes call for mashing raw bananas into the batter. This recipe does not. Roasting the bananas first is the single biggest flavor upgrade you can make, and it takes only ten minutes.
Heat concentrates the natural sugars in the banana, turning them almost caramel-like. The result is a smooth, deeply flavored puree that blends into the cheesecake filling far better than raw banana, delivering real banana flavor in every bite rather than a faint background note.
How to Roast Bananas for Cheesecake
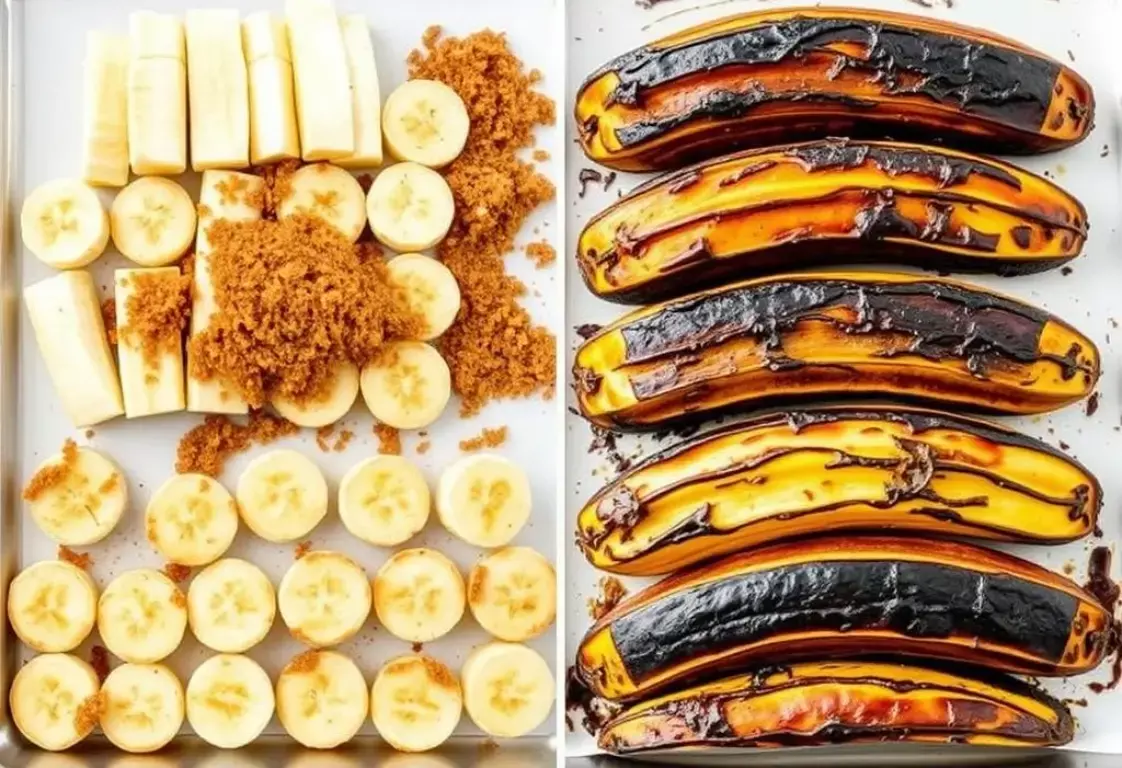
- Preheat the oven to 400F (204C).
- Slice the bananas lengthwise with the peels still on.
- Sprinkle the cut sides with about 1 tablespoon of brown sugar.
- Place them cut-side down on a lined baking sheet, peels facing up.
- Roast for 10 minutes until the skins are completely black and juices are bubbling out onto the sheet.
- Let them cool slightly, then remove the skins and mash the flesh with every drop of the dark caramelized liquid from the pan.
Do not discard the dark liquid on the baking sheet. That caramelized juice is packed with concentrated banana flavor. Scrape every drop into your mixing bowl. It is the most flavorful part of the whole process.
Building the Nilla Wafer Crust
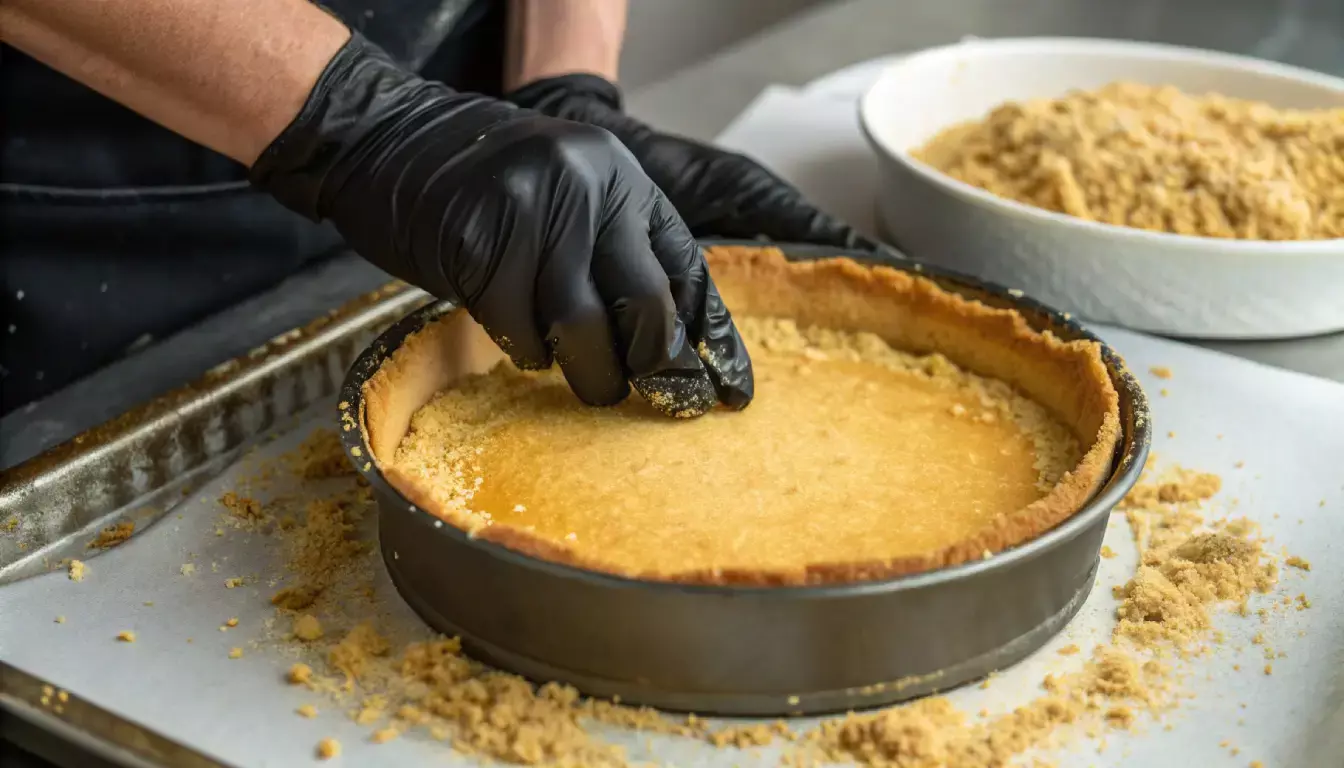
The Nilla Wafer crust is what makes this dessert taste like banana pudding rather than just banana cheesecake. The vanilla cookie flavor is baked into the base and carries through every bite alongside the filling. Graham crackers cannot replicate this, so do not substitute them if you can avoid it.
- Preheat oven to 325F (163C).
- Process Nilla Wafers in a food processor until fine, even crumbs form. No large pieces.
- Combine crumbs with sugar and salt in a medium bowl.
- Add melted butter and stir until all crumbs are evenly moistened. The mixture should hold together when you press a pinch between your fingers.
- Press the mixture firmly into the bottom and about an inch up the sides of a 9-inch springform pan. Use the flat bottom of a measuring cup to pack it tight.
- Bake for 10 minutes until lightly golden and set.
- Cool completely before adding the filling.
Crust fixes: If the crust is too dry and crumbly, add one more tablespoon of melted butter. If it feels greasy or wet, add a small handful of extra crushed wafers. A properly made crust holds together when pressed but does not feel oily.
Making the Banana Cheesecake Filling
A good cheesecake filling is smooth, dense, and mixed carefully. The goal is to avoid incorporating excess air into the batter, which is what causes cheesecakes to puff up during baking and then crack as they cool. Low speed and patience are your best tools here.

- Beat the cream cheese on medium-low speed until completely smooth, about 2 minutes. Stop and scrape the sides of the bowl at least twice.
- Add sugar and mix on low until combined, about 1 to 2 minutes.
- Add the roasted mashed bananas, sour cream, vanilla, and cornstarch (if using). Mix on low until fully incorporated.
- Add eggs one at a time on the lowest speed setting. Mix only until each egg disappears into the batter before adding the next. Do not rush this step.
- Scrape the bowl well after each egg addition.
- Stop mixing the moment the last egg is incorporated. Overmixing at this stage is the number one cause of cracks.
Adding the Banana Middle Layer
For extra banana texture inside each slice, add a fresh banana layer in the middle of the batter before baking:
- Pour roughly one third of the batter into the cooled crust and spread evenly.
- Arrange a single layer of thinly sliced fresh bananas over the batter.
- Pour the remaining batter on top and smooth the surface with a spatula.
The Water Bath: Why It Is Not Optional
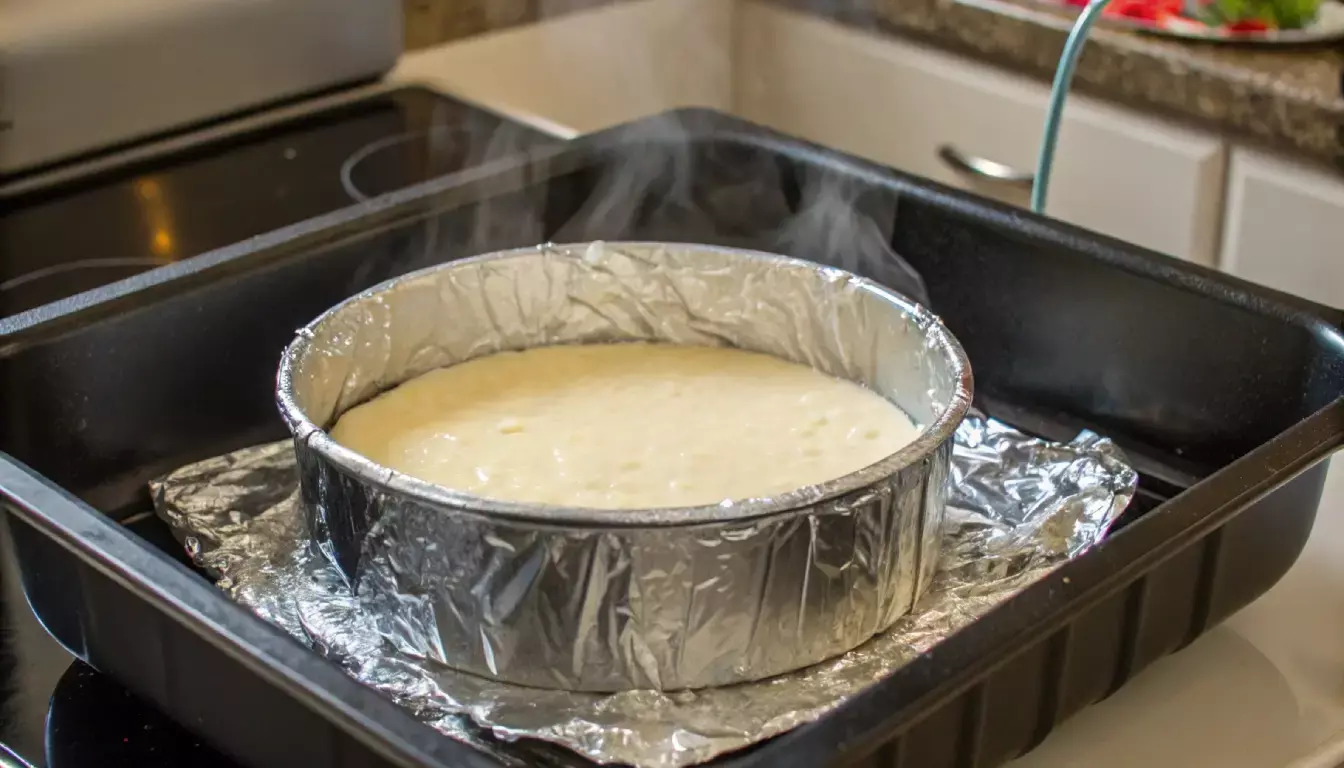
A water bath surrounds the cheesecake with gentle, moist heat during baking. Without it, the outer edges of the cheesecake cook much faster than the center. This uneven cooking causes the edges to set and pull inward while the center is still expanding, which leads to cracks. It is the most skipped step and the most common reason cheesecakes crack.
Method 1: Foil Wrap
- Wrap the outside of the springform pan tightly in two to three layers of heavy-duty foil, pulling it all the way up the sides.
- Set the wrapped pan inside a large roasting pan.
- Pour boiling water into the roasting pan until it reaches halfway up the sides of the springform pan.
- Carefully transfer to the oven without spilling.
Method 2: Double Pan (No Foil Needed)
- Place the 9-inch springform pan inside a 10-inch cake pan.
- Place both pans inside a larger roasting pan.
- Fill the roasting pan with hot water until it reaches halfway up the middle (10-inch) pan.
- The middle pan acts as a water barrier around the springform, no foil wrapping required.
Which method is better? The double pan method is more reliable because there is no risk of water leaking through foil seams into the crust. If you own a 10-inch cake pan, use this method every time.
Baking and Cooling Your Cheesecake
The baking and cooling stages are just as important as the recipe itself. A cheesecake that is perfectly baked but cooled too quickly will crack just as badly as one that was overmixed. Give it time at every stage and the result will be clean and smooth.
- Preheat oven to 325F (163C).
- Place the cheesecake in the water bath and bake for 70 to 80 minutes.
- Check for doneness: the outer 2 inches should be firm and set. The center 2 to 3 inches should still have a uniform, gentle jiggle, like set Jell-O, not a liquid wave.
- Turn off the oven when done. Do not open the door yet.
- After 10 minutes, crack the oven door about an inch and leave the cheesecake inside for 1 full hour. This gradual temperature drop prevents the surface from contracting too quickly.
- Remove the cheesecake to a cooling rack and let it reach room temperature over 1 to 2 more hours.
- Run a thin knife around the edge of the pan to loosen the cheesecake from the sides before refrigerating.
- Refrigerate for at least 4 hours, overnight if possible, before adding any toppings.
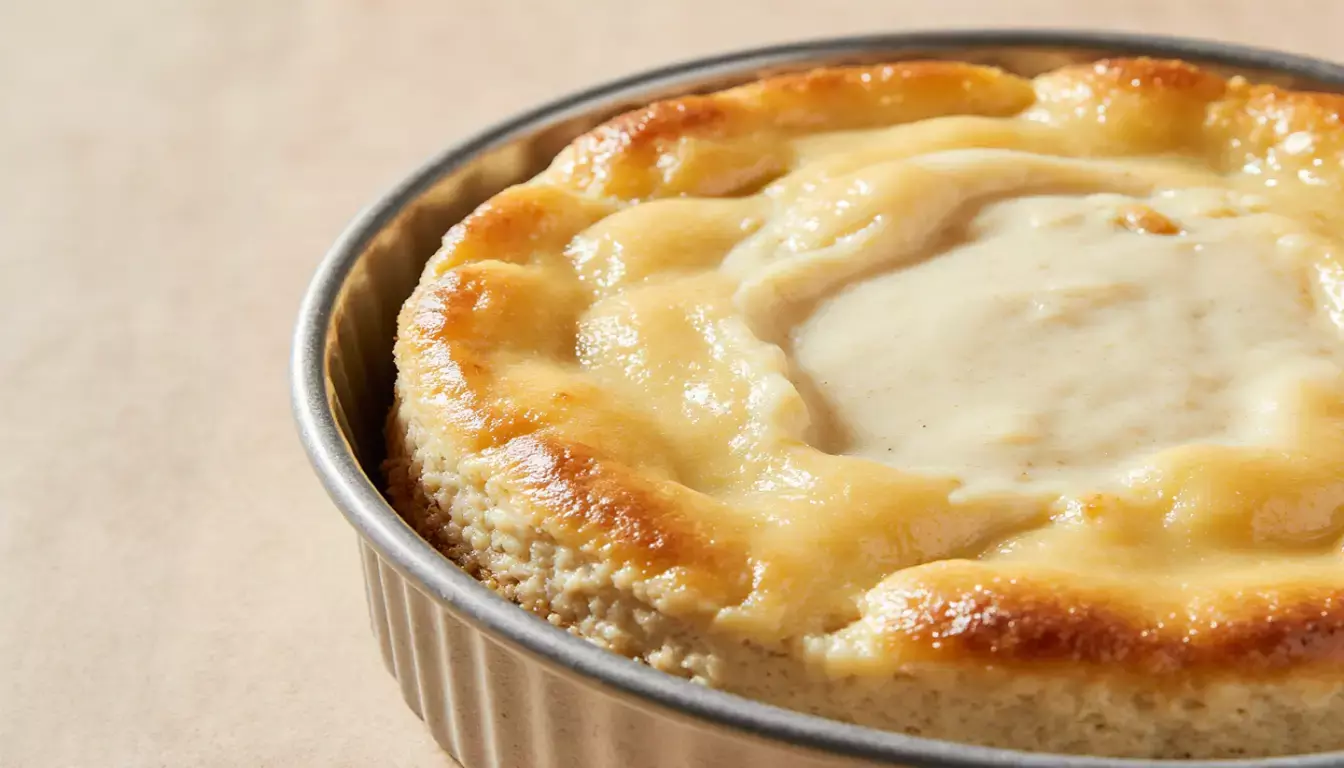
Never move a warm cheesecake directly to the refrigerator. The sudden temperature change causes the surface to contract rapidly, which almost always results in cracks. Cool it at room temperature first, every time.
No-Bake Banana Pudding Cheesecake
If baking cheesecakes feels intimidating, or you simply want a faster result, this no-bake version sets overnight in the refrigerator with no eggs, no water bath, and no oven. The texture is lighter and creamier than the baked version, closer to a rich mousse, but it captures all the same banana pudding flavors.
No-Bake Ingredients
- Nilla Wafer crust: Same as the baked version. Press into the pan and refrigerate instead of baking.
- Cream cheese (16 oz / 2 blocks): Softened to room temperature.
- Instant banana pudding mix (1 package, 3.4 oz): Replaces the roasted bananas and eggs as the primary flavor and structure.
- Cold milk (1 cup): Activates the pudding mix.
- Heavy whipping cream (1 cup): Whipped to stiff peaks. This is what sets the filling without baking.
- Powdered sugar (1/2 cup).
- Vanilla extract (1 tsp).
- Fresh banana slices for layering inside and on top.
No-Bake Method
- Press the Nilla Wafer crust into the springform pan. Refrigerate while making the filling.
- Beat cream cheese until completely smooth, with no lumps.
- In a separate bowl, whisk the pudding mix with cold milk for 2 minutes until thickened. Add to the cream cheese and mix until smooth.
- In another bowl, whip the heavy cream with powdered sugar and vanilla to stiff peaks.
- Fold the whipped cream into the cream cheese mixture gently, using a spatula, until fully combined. Do not stir aggressively or you will deflate the cream.
- Pour half the filling over the crust. Arrange a layer of banana slices. Pour the remaining filling on top and smooth the surface.
- Cover and refrigerate for a minimum of 6 hours, overnight for best results.
- Just before serving, add whipped cream and Nilla Wafer garnish.
No-bake vs. baked: The baked version has a denser, richer texture and deeper banana flavor from the roasted bananas. The no-bake version is lighter, quicker, and more forgiving for beginners. Both deliver the full banana pudding experience.
Easy Banana Pudding Cheesecake: Beginner Shortcuts
If this is your first cheesecake, these shortcuts reduce the complexity without losing much of the final result:
- Skip roasting: Mash 2 very ripe, heavily speckled bananas directly into the batter. The flavor will be slightly lighter but still very good.
- Use a store-bought crust: A pre-made Nilla Wafer crust from the supermarket saves one baking step and still tastes great.
- Lower temperature instead of water bath: Bake at 300F for 85 to 90 minutes. The lower temperature reduces cracking without needing a water bath. Not as reliable, but much simpler for beginners.
- Use Cool Whip for the topping: Saves time with a small but acceptable difference in flavor compared to homemade whipped cream.
- Add banana pudding mix to the filling: One package stirred into the cream cheese batter gives built-in banana flavor and reduces reliance on fresh bananas.
Finishing Your Banana Pudding Cheesecake
The pudding layer and whipped cream topping are what transform a banana cheesecake into a true banana pudding cheesecake. Do not skip them. They are the elements that make this dessert instantly recognizable.
Vanilla Pudding Layer
- Whisk half a package of instant vanilla pudding mix with 1 cup of cold milk for 2 minutes until thickened and smooth.
- Arrange fresh banana slices in a single layer on top of the fully chilled cheesecake.
- Spread the pudding evenly over the banana slices, covering all exposed banana surfaces completely. This prevents the bananas from browning.
- Refrigerate the cheesecake with the pudding layer for at least 4 more hours before adding the whipped cream.
Whipped Cream Topping
- Combine heavy cream, powdered sugar, and vanilla extract in a chilled bowl.
- Beat on medium speed until the mixture begins to thicken, then increase to medium-high.
- Continue beating until soft to medium peaks form. Do not overbeat or the cream will become grainy.
- Pipe or spread the whipped cream over the chilled cheesecake just before serving.
- Arrange whole or crushed Nilla Wafers and fresh banana slices on top as garnish.
Timing tip: Add the whipped cream and Nilla Wafer garnish no more than 1 to 2 hours before serving. This keeps the cookies crisp and the banana slices looking fresh.
Pro Tips for a Perfect Result Every Time
Preventing Common Problems
- Cracks: Water bath plus low mixing speed after adding eggs plus slow oven cooling. These three steps together eliminate almost all cracking issues.
- Lumpy batter: Room temperature cream cheese, beaten smooth on its own before anything else is added.
- Soggy crust: Pre-bake the crust fully and make sure the foil wrap (if using) is watertight.
- Browning bananas: Cover sliced banana layers completely with pudding, or add fresh slices right before serving.
Flavor and Texture Upgrades
- Maximize banana flavor: Use the ripest bananas you can find and always roast them. This is the single biggest flavor improvement in this recipe.
- Creamier texture: Full-fat sour cream and not overmixing after the eggs are the two most important factors.
- Clean, even slices: Dip a sharp knife in hot water and wipe it dry between each cut.
- Stable whipped cream: Add 1 tablespoon of instant vanilla pudding mix while whipping the cream. It holds for hours without deflating.

Make-Ahead and Storage
- Make ahead: The baked cheesecake base keeps refrigerated for 3 to 4 days before adding toppings. This makes it ideal for prepping before a party or holiday.
- Freezing: Freeze the baked cheesecake without any toppings for up to 3 months, wrapped tightly in plastic wrap and then foil.
- Thawing: Thaw overnight in the refrigerator. Add fresh pudding layer, whipped cream, and garnish just before serving.
- Leftovers: Store covered in the refrigerator for up to 5 days.
Variations and Adaptations
Flavor Variations
- Chocolate Banana: Add 1/4 cup cocoa powder to the filling, or drizzle with chocolate ganache before serving.
- Caramel Banana: Spread a layer of caramel sauce between the crust and filling, or drizzle over the whipped cream topping.
- Coconut Banana: Add 1/2 cup toasted coconut to the crust crumbs and sprinkle more on top of the whipped cream.
- Peanut Butter Banana: Swirl 3 tablespoons of peanut butter into the filling before baking.
Dietary Adaptations
- Gluten-free: Swap the Nilla Wafers for gluten-free vanilla cookies. The rest of the recipe is naturally gluten-free.
- Lower sugar: Reduce the sugar in the filling by 1/4 cup and rely on very ripe bananas for natural sweetness.
- Dairy-free: Use dairy-free cream cheese, coconut cream in place of sour cream, and coconut whipped cream for the topping.
- Mini cheesecakes: Divide the batter between a lined muffin tin and bake for 20 to 25 minutes. No water bath needed for the mini version.
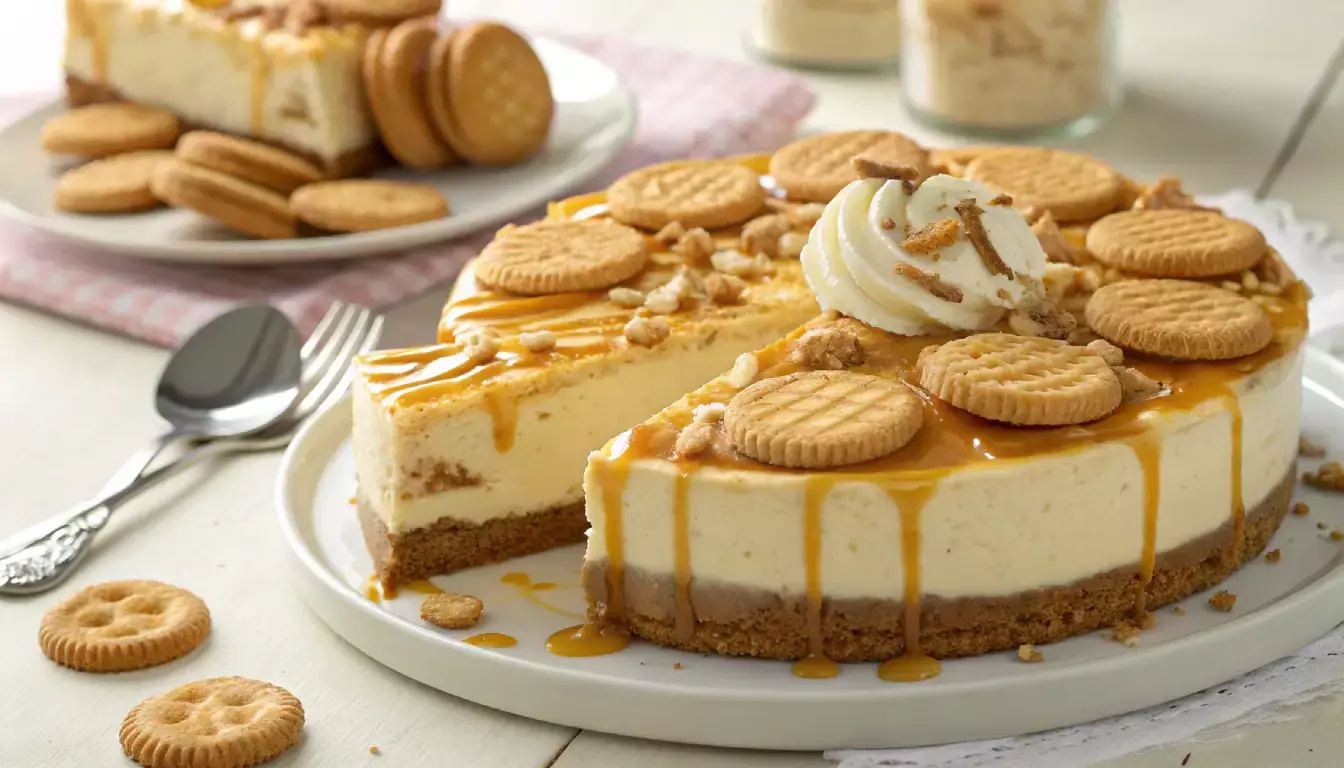
Banana Pudding Cheesecake Recipe
A rich, creamy dessert that layers roasted banana cheesecake with all the classic elements of Southern banana pudding: buttery Nilla Wafer crust, vanilla pudding layer, and homemade whipped cream topping.
Roasted Bananas
- 2 medium ripe bananas
- 1 tablespoon brown sugar
Nilla Wafer Crust
- 2 cups (275g) Nilla Wafer crumbs (about 60 cookies)
- 2 tablespoons granulated sugar
- 1/2 cup (110g) unsalted butter, melted
- Pinch of salt
Cheesecake Filling
- 32 oz (900g) full-fat cream cheese, room temperature
- 3/4 cup (150g) granulated sugar
- 1/3 cup (80g) full-fat sour cream, room temperature
- 2 teaspoons vanilla extract
- 2 tablespoons cornstarch (optional but recommended)
- 4 large eggs, room temperature
- 1 to 2 bananas, thinly sliced (for the middle layer)
Pudding Layer
- 1/2 package (1.7 oz / 48g) instant vanilla pudding mix
- 1 cup (240ml) cold milk
- 2 bananas, sliced
Whipped Cream Topping
- 2 cups (480ml) heavy whipping cream
- 2 tablespoons powdered sugar
- 1 teaspoon vanilla extract
- Nilla Wafers for garnish
Instructions
1. Roast the Bananas
- Preheat oven to 400F (204C).
- Slice bananas lengthwise with peels on. Sprinkle cut sides with brown sugar.
- Place cut-side down on a lined baking sheet. Roast 10 minutes until skins are completely black.
- Cool slightly, remove skins, and mash the flesh with all the caramelized juices from the pan.
2. Make the Crust
- Reduce oven to 325F (163C).
- Mix Nilla Wafer crumbs, sugar, salt, and melted butter until evenly moistened.
- Press firmly into bottom and about 1 inch up the sides of a 9-inch springform pan.
- Bake 10 minutes. Cool completely before filling.
3. Make the Filling
- Beat cream cheese on medium-low until completely smooth, about 2 minutes.
- Add sugar, mix 1 to 2 minutes on low.
- Add roasted bananas, sour cream, vanilla, and cornstarch on low speed until combined.
- Add eggs one at a time on the lowest speed, mixing just until each one disappears before adding the next.
- Pour one third of the batter over the cooled crust. Arrange banana slices. Pour the remaining batter on top and smooth the surface.
4. Bake
- Wrap the springform pan in foil or use the double-pan water bath method. Place in a roasting pan with boiling water halfway up the sides.
- Bake at 325F for 70 to 80 minutes. Edges should be set; the center 2 to 3 inches should jiggle gently.
- Turn off the oven. Crack the door. Leave the cheesecake inside for 1 hour.
- Cool at room temperature for 1 to 2 more hours, then refrigerate at least 4 hours or overnight.
5. Add the Toppings
- Whisk pudding mix with cold milk for 2 minutes until thickened.
- Arrange banana slices over the chilled cheesecake.
- Spread pudding over the bananas, covering them completely.
- Refrigerate 4 more hours.
- Just before serving, whip cream with sugar and vanilla to soft peaks. Pipe or spread over the cheesecake. Garnish with Nilla Wafers.
Storage
- Refrigerator: Covered, up to 5 days.
- Freezer: Without toppings, up to 3 months. Thaw overnight in the refrigerator.
Frequently Asked Questions
Banana cheesecake simply adds banana flavor to a standard cheesecake filling. Banana pudding cheesecake recreates the full Southern banana pudding experience: it requires a Nilla Wafer crust (not graham cracker), a banana cream cheese filling, a vanilla pudding layer on top, and whipped cream with Nilla Wafer garnish. Every element of the traditional layered pudding is present.
Yes. The no-bake version uses cream cheese, whipped cream, and instant banana pudding mix with no eggs, no oven, and no water bath. The filling sets in the refrigerator overnight and results in a lighter, creamier texture. The full no-bake recipe is included above.
Cracks are almost always caused by one of three things: overmixing the batter after adding eggs, skipping the water bath, or cooling too quickly. Use a water bath, mix on the lowest speed setting after adding eggs, and always let the cheesecake cool gradually inside the oven with the door cracked before moving it to the counter.
Stored covered in the refrigerator, banana pudding cheesecake keeps well for up to 5 days. Add the Nilla Wafer garnish just before serving so it stays crisp. Without toppings, the baked cheesecake base can be frozen for up to 3 months. Thaw overnight in the refrigerator and add fresh toppings before serving.
Yes. One package of instant banana pudding mix can be added directly to the cream cheese batter for strong banana flavor without roasting. For the best result, combine the pudding mix with real ripe bananas rather than relying on the pudding mix alone. The real banana adds depth that artificial flavoring cannot fully replicate.
For roasting and the filling, use bananas with heavy brown speckles. The riper, the better. Very ripe bananas have more natural sugar and far more intense flavor. For the sliced banana layers used as garnish, use slightly firmer yellow bananas with minimal spots. They hold their shape better and do not become soft during refrigeration.
Yes. A deep dish pie plate works for a pie-style version. A regular cake pan lined with overhanging parchment paper also works: the parchment acts as handles to lift the fully chilled cheesecake out cleanly. Mini cheesecakes in a lined muffin tin are another great option and require only 20 to 25 minutes of baking time.
The baked cheesecake base can be made 3 to 4 days in advance and kept refrigerated. Add the pudding layer no more than 24 hours before serving. Add the whipped cream and Nilla Wafer garnish no more than 1 to 2 hours before serving for the best presentation and texture.
Ready to Make Your Banana Pudding Cheesecake?
This banana pudding cheesecake brings two beloved American classics together in one memorable dessert. Whether you choose the full baked version with roasted bananas and a water bath, or the simplified no-bake version for a quicker result, the combination of buttery Nilla Wafer crust, creamy banana filling, vanilla pudding layer, and homemade whipped cream topping is genuinely hard to beat.
The keys to success are consistent throughout: use the ripest bananas you can find, bring all dairy ingredients to room temperature before you start, never rush the cooling process, and add the garnishes just before serving.

Loved This Recipe?
Explore more carefully selected dessert recipes from DessertRecipesLab.
Browse All Recipes